

The CameraSim website has a great web app explaining how a DSLR works. It can be complicated to think about, but this visual representation does a good job explaining what happens when you press down the shutter button.
I'll walk you through how to use this simulator to learn about DSLR technology.
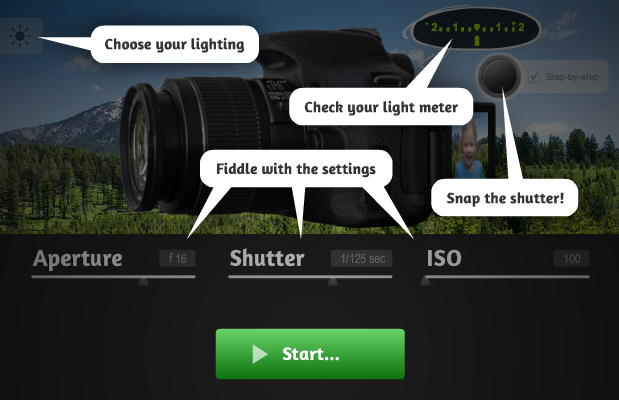
When you first open the simulator everything will be greyed out, but you can see where the options are to choose your lighting, fiddle with settings, check your light meter, and snap the shutter. Click the green Start button to get going!
1. Choose your lighting.
This is the first thing you should do any time you pick up a camera, not just with this simulation!
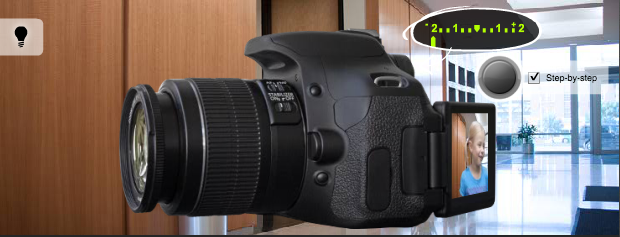
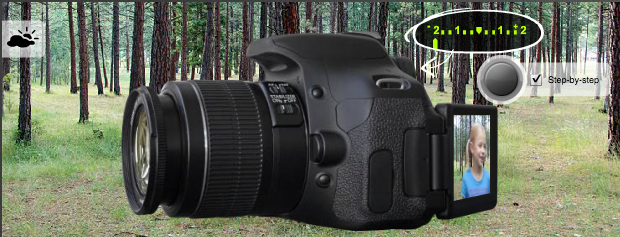
Very first, check your lighting. Are you inside or outside? Is it bright sunlight or a hazy day?
The simulator starts with a mountain scene as the brightest place you might be taking pictures, so click the (-) button repeatedly to scroll to make it progressively darker, all the way to a basement.
I really appreciate that this is part of the simulator because there really is no one-size-fits-all-formula for using your DSLR. Lots of people ask for one, but it truly depends on the situation and the lighting. Your ISO and other settings will all depend on the lighting around you.
2. Fiddle with your settings.
This simulator is recreating manual mode. You, as the photographer, get to choose your settings for aperture, shutter, and ISO. The camera isn't going to make any decisions for you to correct the lighting, which is a great way to learn!
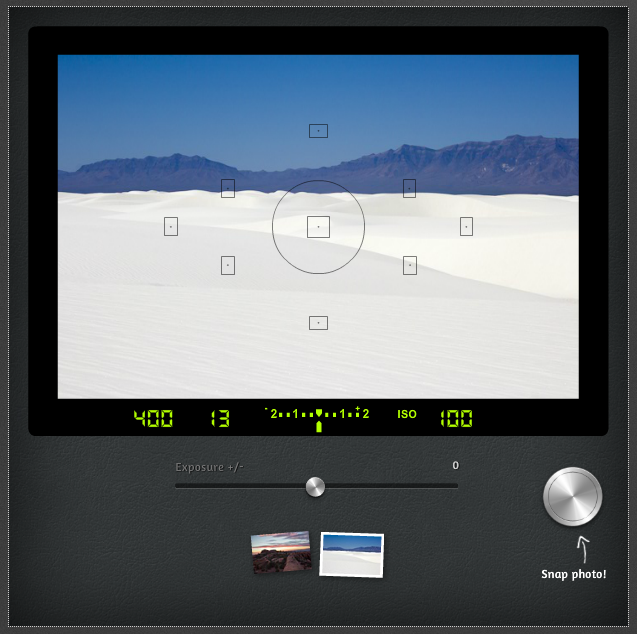
Grab the slider under aperture to move it. You'll notice several things change: the f-number goes up or down, the aperture opens wider stops down in the icon, and the little green tick mark in the light meter slides between under and over-exposed.
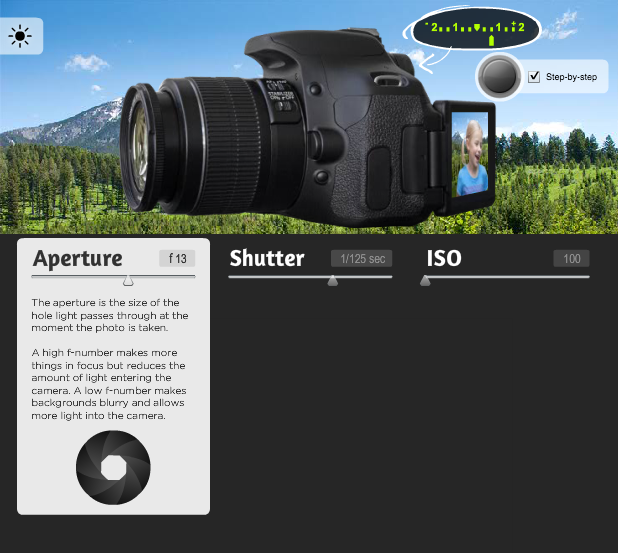
The light meter is judging how much light is coming through your lens at the settings you've specified. It's making it's best guess as to whether this is enough light to create a properly exposed picture, which it designates as "0."
If the arrow is along those tick marks towards the "+" side, then the camera thinks that the picture will be over-exposed, or too bright. If the arrow is going towards the "-" side, then the camera is guessing that the photo will be under-exposed, or darker than you'd like.
Remember, the light meter doesn't change anything, it's just giving you a reading about how much light it's getting.
As you change the aperture slider, the camera is reevaluating the light. If you slide the aperture dial to the left, the f-number does down, which means there is a larger aperture opening for light to come in.
As the f-number gets higher, the opening is actually getting smaller (since it's a ratio, and 1/22 is a smaller opening than 1/4). See how the light meter changes according to how wide the lens is open?
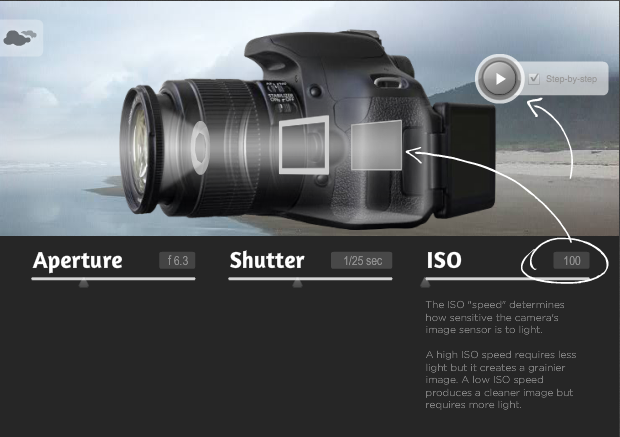
This is the same way the other settings work too! Drag the sliders for shutter speed (slower means more light, faster means less light) and ISO (the higher your ISO, the more sensitive your camera will be to the available light, and brighter it can make the picture).
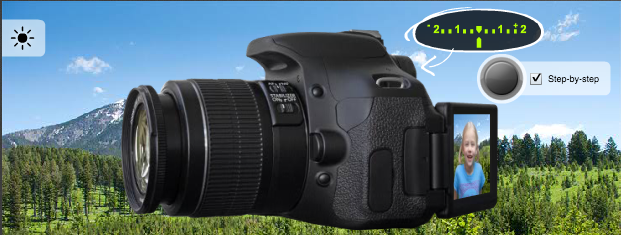
3. Check your light meter.
The light meter indicates if the camera has enough light to create a good photo - not too dark or too bright.
Once you start changing your settings, you'll see that everything you do changes the reading on your light meter. This is completely true when you're using a real camera as well! If you change one element, you'll probably have to change another element to balance it out.
You want that green tick mark to be at or near the middle of that number line for a well-exposed photograph.
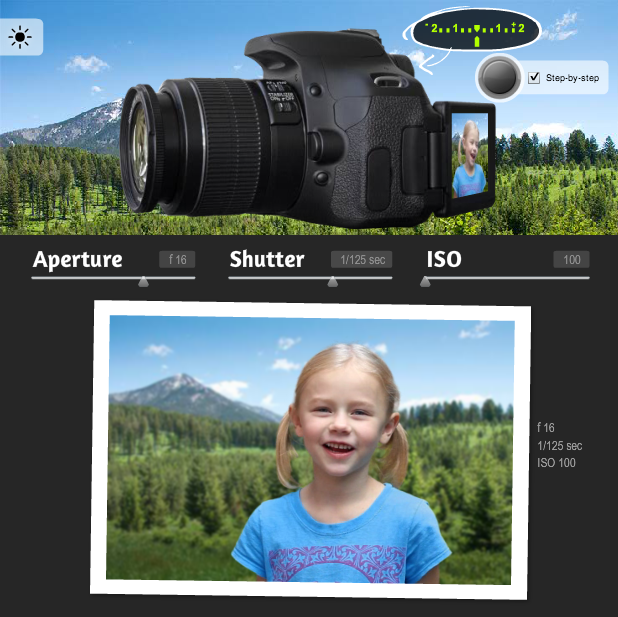
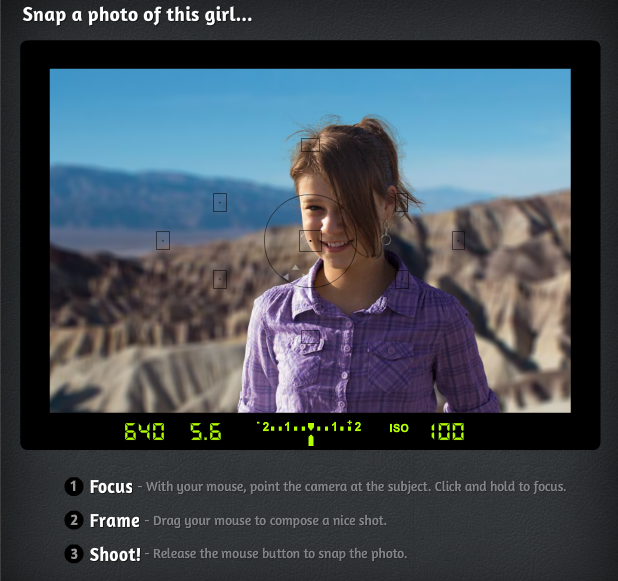
4. Snap the shutter!
When you're ready, press down the shutter button and snap your picture. It will show you what a picture would look like with your current settings.
The first time you press the shutter, I'd take the time to actually read through the play-by-play descriptions. It's a great, concise explanation of the order of things in your DSLR, and how everything works together. You'll have to click the shutter/play button to advance forward.
After you've read it a few times you can uncheck the "step-by-step" box on the top right to speed things up, but I really think it's worthwhile to understand the step-by-step run through.
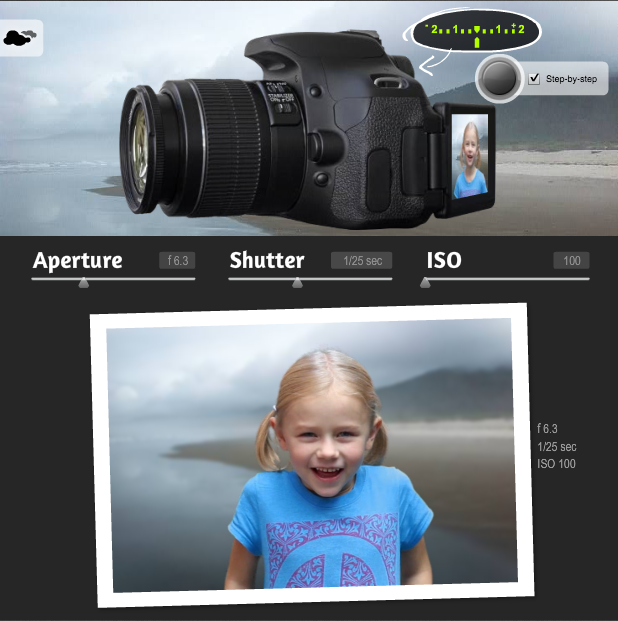
It's so cool to see a photo that you "took" through the camera simulator. It will honor the lighting and camera settings you set, so you will see fairly accurate results for that combination of settings in that lighting situation.
If your shutter speed was too fast, the photo will be too dark. If the aperture was wide open for too long, it really will be blown out.
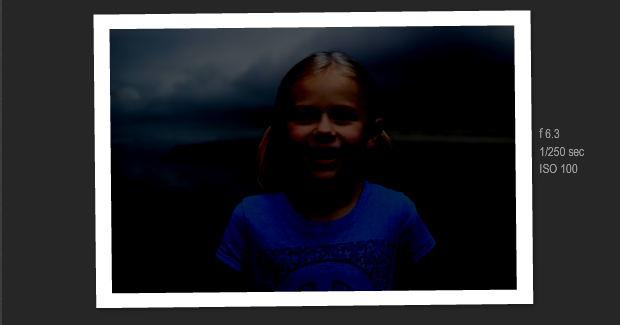
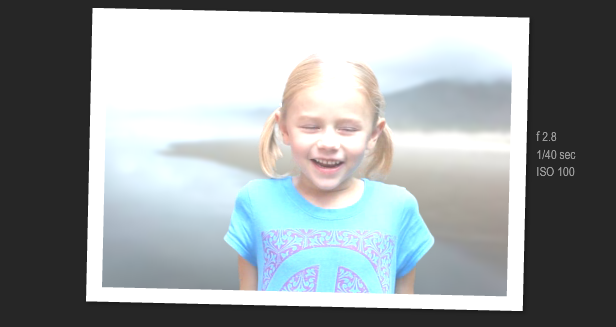
Getting this instant feedback can really help you learn about your camera without the frustration of incorrect settings in real life.
I'm pretty convinced that the fastest way to get better at photography is by understanding what's going on inside your camera. The CameraSim DSLR Tool can help you quickly learn in a distraction-free environment. Check it out here; it's totally free!
Do you think this is a good way to learn? Posts about the other CameraSim learning tools are here:
CameraSim: Exposure Compensation
CameraSim: Composition and Framing
Stacie says
This is so cool! Whoever thought of this was a genius! I love that it let's you practice without getting mad about ruining real pictures.