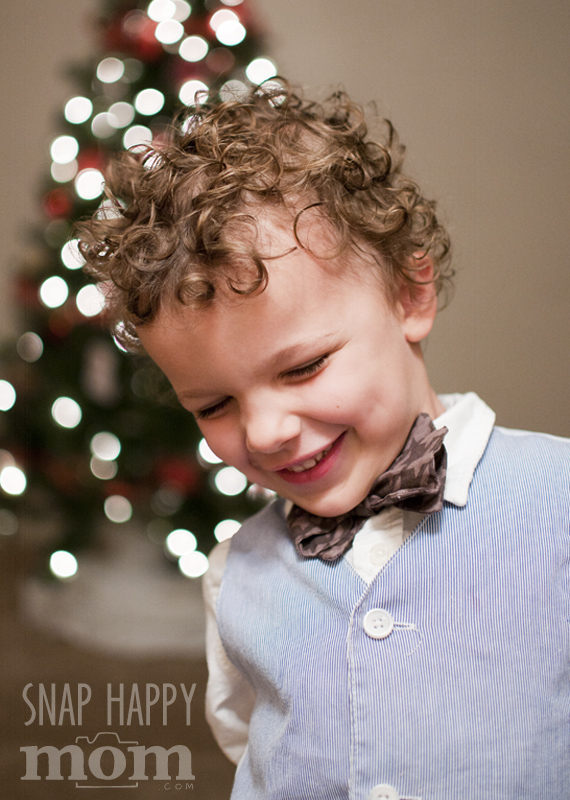
I'm sure you've seen artistic pictures of beautiful, big, blurry Christmas tree lights. I'm going to show you how take Christmas pictures of your children with a blurry background. Many of these tips can be used with a compact camera even if you don't have a DSLR.
A Quick Lesson on Bokeh
The reason those Christmas lights look so big and beautifully blurry is a photography term called bokeh (pronounced bo-kuh if you're wondering). It means that your picture has a very shallow depth of field, so only a small area of your photo is actually in focus, and everything that is not on that plane of focus is blurry. The circular pattern of that background is called bokeh, and it happens all the time in good portrait photography because it helps you focus on subject instead of a distracting background. When you add tiny twinkling lights to that background, bokeh becomes magical!
There Are Two Ways to Create Bokeh!
1. Use a Very Wide Aperture
There are two ways you can create the right situation for bokeh in your Christmas pictures. The first is to use a lens with a very wide aperture, like my favorite Nikon 35mm f/1.8 or Canon version here. An aperture like f/1.8 lets in a ton of light and creates a very shallow depth of field in the photo. This means that anything you are not focusing on will be blurry.
So whatever lens you have available, set the aperture to be as low a number as possible (which translated to the widest opening for light). On a prime you can do f/1.8 or f/2, but if you only have the lens that camera with your camera, this will be f/3.5, in an unzoomed position.
2. Create Physical Space Between Subject and Background
The second way to create the right situation for bokeh is to actually manipulate your depth of field physically.
You know you will be focusing on your subject, so you want to purposely put some space between your subject and the background that you want to blur out. The farther away your subject from the background, the blurrier it will be.
Any kind of camera can take advantage of this tip: even your point and shoot can create bokeh if you force enough space in there!
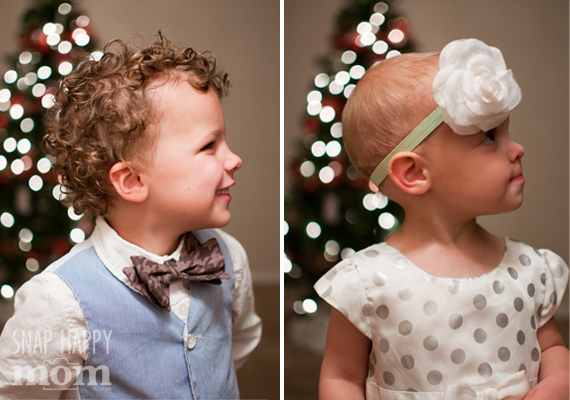
For these pictures, I wanted a portrait of each of my kids with a blurry Christmas light background. My Christmas tree needed to stay where it is, so I placed a chair where I wanted my kids to stand a good 10 feet away from the tree. The tripod was just a few feet from the chair, allowing me to get a close-up of the child's face. That means the Christmas lights are far away from my point of focus, which gives them a good chance of being beautiful bokeh circles.
BOKEH TIP: Get Your Space Ready First
Get your space as ready as possible before you put your kids into the equation!
It may take a few tries to get the light right for this type of picture, and most kids lose patience quickly if asked to sit through endless settings tweaks.
I placed my chair and tripod where I wanted them, and turned off the lights close to the Christmas tree. I left one light on very close to the my subject to light up their cute smiling face, while still keeping some of the glow of the Christmas tree in the background. Stick a stuffed animal or something on the chair so you can fiddle with your light settings before your kids get their cheesy smile.
BOKEH TIP: Settings Guidelines
If you are using a DSLR, you definitely want to be in manual mode. The settings that worked the best for me were these:
ISO: 1000 or more (this makes my camera more sensitive to the available light)
shutter speed: 1/125 second (this is just fast enough to have a sharp picture, while letting a decent amount of light in.)
aperture: f/1.8 (this allows tons of light into my picture, and gives me a very shallow depth of field to encourage bokeh).
--if you only have the lens that came with your camera, called a kit lens, you will not be able to go down to f/1.8. That's why I recommend getting this Canon lens or this Nikon lens - it's less than a $200 investment that allows you to get great portraits of your kids for years to come, not just in front of the tree!)
Your settings may be slightly different, depending on the lighting in the room. Try a few and then adjust accordingly. If it's too dark, then you either need to turn on more light in the room or raise your ISO to allow your camera to be more sensitive. You can make your shutter speed a bit longer, but after 1/60th you'll get motion blur. If they are too bright, speed up your shutter speed until it's perfect.
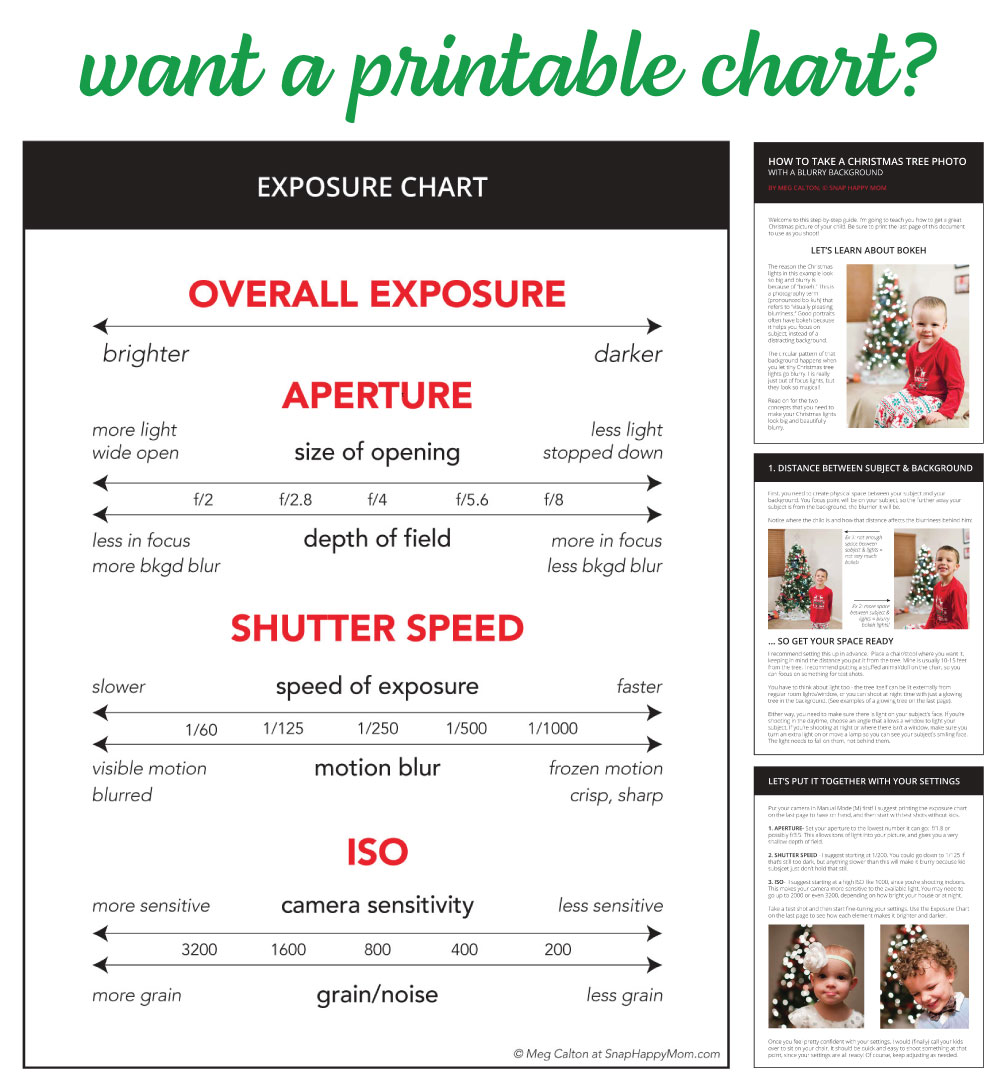
If you need help with understanding which settings make it brighter, and what setting make it darker, I can help! I made a printable Exposure Chart that makes it really easy to understand how aperture, shutter speed and ISO work together.
The chart is actually included in the free Tutorial Download below. It has more details and instructions for taking the perfect Christmas portrait.
Download this free, six-page document with printable chart below:
FREE PRINTABLE CHART & TUTORIAL
Sign up below for a printable PDF tutorial and exposure chart.
Subscribe here to get weekly photography tips and a free 6-page tutorial of how to take amazing pictures with a blurry tree in the background.
Check your email to confirm and download your pdf!
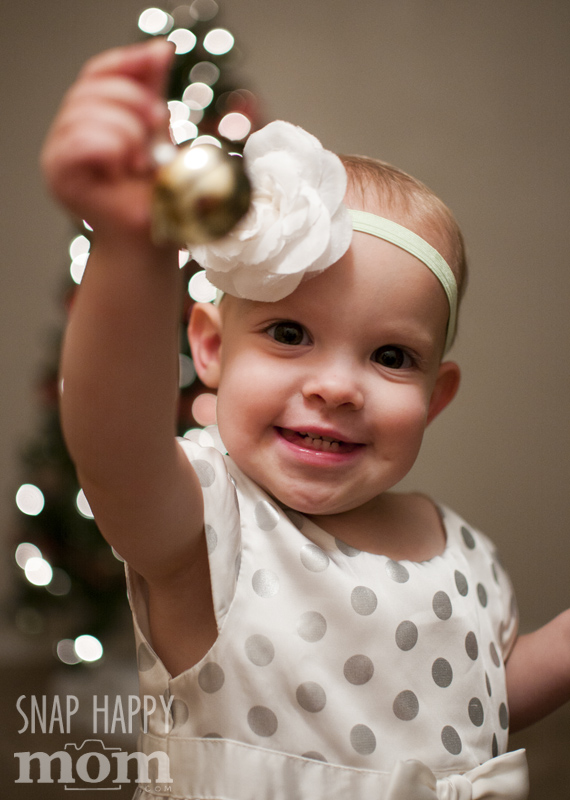
If you're using a compact camera, you want to avoid the flash. Check if there is a night or low-light setting, and put your subject as far away from the tree as you can!
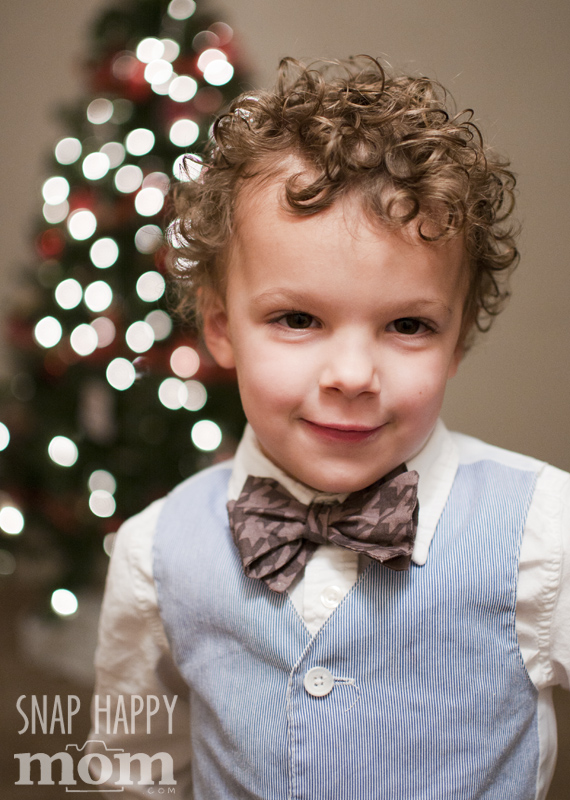
Show off that Ornament!
This is great way to showcase each year's special ornament as well. Have your child hold their special ornament near their face where it is still in the light, and then you can take the sweet shot with them putting the tree up later.
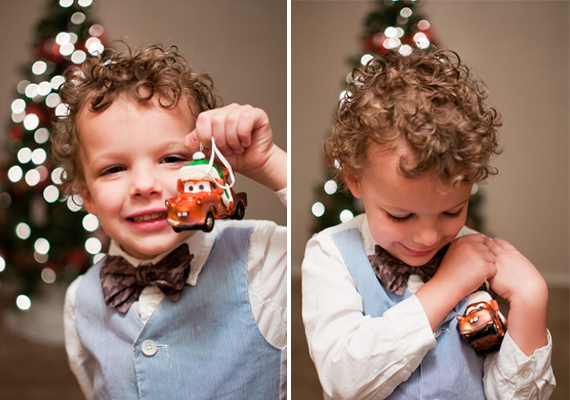
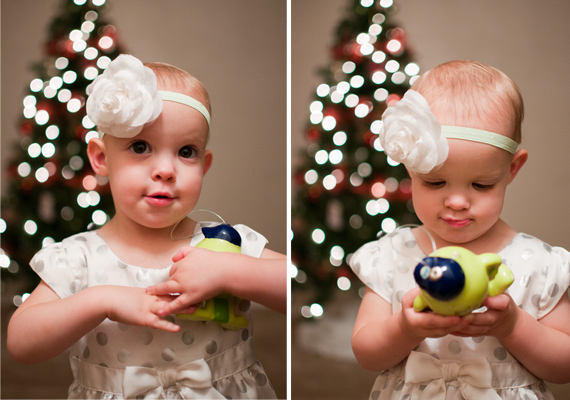
I'm excited to see some of your pretty Christmas Pictures with bokeh. Pin it if you learned something!
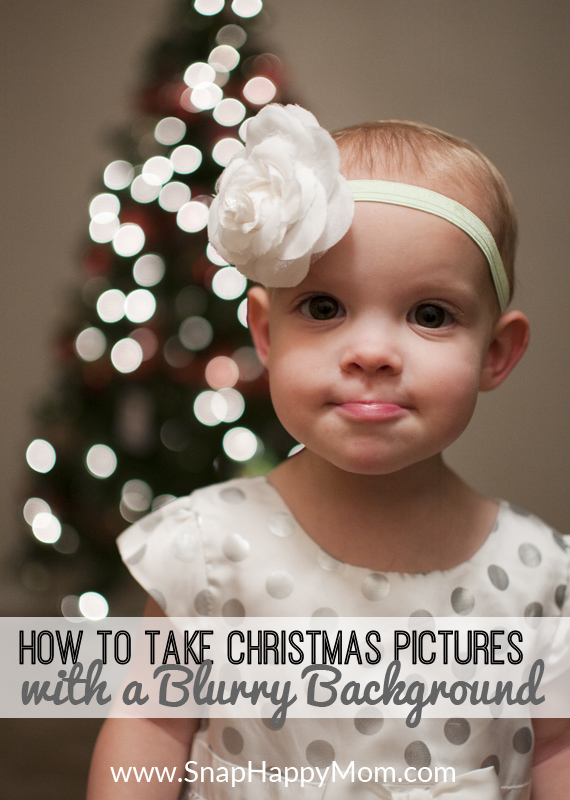
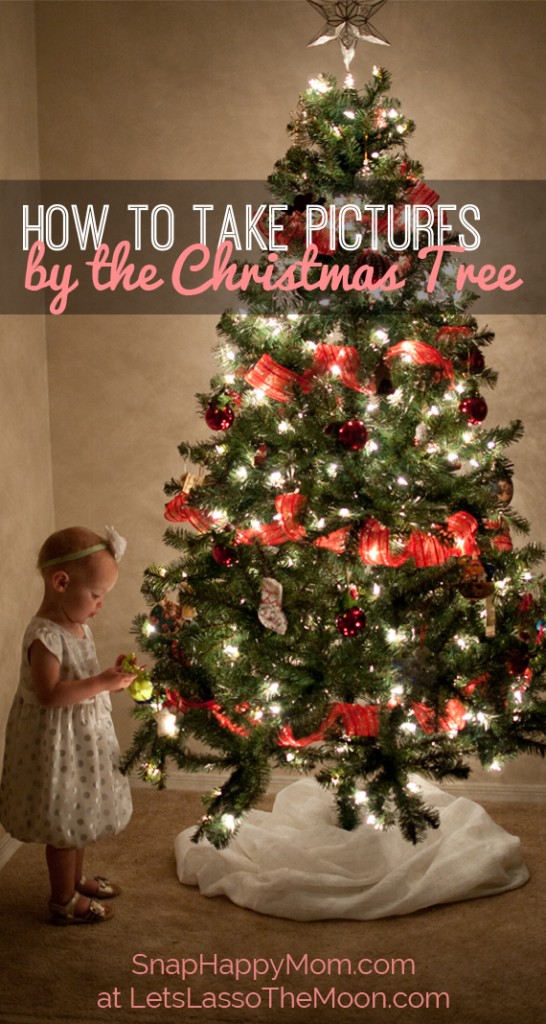
Want to take pictures of your kids next to the tree instead? Check out my tutorial about how to take the classic shot of your kids putting ornaments on the glowing tree at Let's Lasso The Moon. It has some great information, and of course, more pictures!


Marsali says
Oh my heavens, I LOVE these pictures!
Doug says
This was a great explanation. I have moderate experience with portraits and this was just my speed.
Thank you for sharing!
Guy Perkins says
Love the pictures! The little ones always make for great subjects. I recently posted on my own blog, and linked you in the body so check it out, you may have more people coming your way.
Meg says
Awesome! I'm glad you got started on your blog!
Stephanie says
This is a great tutorial. I will have to try this soon. What light did you use by the kids? Just a lamp? And all the other lights were turned off?
Meg says
We have a front hall light right inside our door where the kids were standing, so that was on. The light was coming mostly from above my kids, and it would be better to use a lamp or light that was all the way in front of the kids instead, to avoid under eye shadows.
Stacie says
I love these pictures! I am going to try it with my new camera 🙂
Vicki Baard says
Lovely photos! You can also change the shape of the bokeh by cutting out a heart shape in a shield that you place over the lens, it worked for me and has a stunning effect!
Meg says
You're right, you can do that! This was just a basic tutorial, but the options for creative bokeh are endless!
Chris says
Happened upon this post googling pictures of blurry christmas trees.
The funny thing is this is what Christmas trees look like if you're near-sighted and not wearing glasses. Every year when we put ours up I turn the room lights off, take my glasses off and just stare at it for a while.
Ashley says
My aperture won't go lower than 3.4 or I am not doing it right? Is there a way to still get the effect?
Meg says
My guess is that you're using a kit lens, the one that camera with your dslr. Is that right?
All lenses have a maximum aperture, which is how low that number will go. That's why I recommended the 35mm of 50 mm f/1.8. On a kit lens, this will be more like f/3.5, in an unzoomed position.
If you are using a lens with a large aperture, my guess is that you're not in full manual where you can force that f/number lower. What mode are you shooting in?
Melissa says
I'm having the same issue... I can only get it to f4 with my lens- then the shutter speed's so slow that any movement makes it crazy blurry. There's no way I can do a shot of my 4 month old in front of my tree and have him in focus like this! lol Any suggestions if you can't get a lower f/stop?
Thanks!
Meg says
If your picture is blurry and you cannot open up your aperture any more, then you need more light. That probably means you need to try to take this picture in the day time: the tree lights will still create bokeh, they will just "glow" a little less.
You should also turn your ISO up higher to make your camera more sensitive to the light you do have.
Tamara says
Merry Christmas! I Love your tutorial! I searched High & Low (as I saw this post in 2013) for these instructions for 2014 pics. However, I don't think I have the correct lens. I'm a beginner & have the Nikon 3000. Lens are 55-200mm, 50mm & 18-55mm. I'm not taking any Christmas decor' down until I get this right LoL. Any suggestions would be very much welcomed!!!
Meg says
I'd suggest using your 50mm lens for this- I assume it has the highest maximum aperture (f/1.8) out of those options. It will probably be easiest to take this picture in the daytime as well- the lights can still have that bokeh effect during the day! Start with the lowest f-stop number you can get, and use the tips above. Good luck!
yana says
Hi! Thank you for this post, it's pretty awesome. i was wondering what camera (make/model) you are using? Thanks!
Lacey says
I cant find the way to download the free pdf print out tutorial, i cant find the place to put my email to get the pdf. I realize this is a really old post. Is this option still avaiable?