
A friend of mine just bought a new camera, her first DSLR. She was so excited about it. A week after she got it, I saw this Facebook message: “Yesterday my new camera fell off the strap while I was carrying it around my neck. It landed on the lens (with the cover on) but now there's a snag when I try to zoom and it makes a funny noise when auto-focusing.”
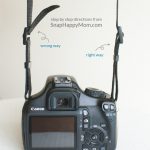
Total bummer! When I went to help her, this is how the strap had been attached:

It turns out she hadn't fastened the strap on correctly when she took the camera out of the box, and it was incredibly unsafe. Now she needs to fix the motor on her brand new lens!
Whether your camera is well-loved or a week old, you need to make sure your strap is on correctly. Chances are it's on mostly right, but has these annoying little ends sticking out, like this:

Those flappy ends are called bunny ears. Although this is safer than how my friend had hers attached, there is a better way!

The ideal situation is that the strap is locked through the buckle, with the end tucked inside, not flopping around. The sliding retainer piece just keeps everything together.
Want to know how? Your camera manufacturer recommends this as the best way to put on your strap, and I've broken it down for you here, step by step.
1. Lay out your pieces like this:

2. Loop the strap through the eyelet on the camera with the buckle facing the correct direction, as shown.

3. Feed the strap back through the retainer piece, then slide the retainer all the way up to the eyelet.


4. Loosen the strap from the underside of the buckle piece to create some space, and then feed the strap through the buckle. Make sure you are feeding it through the far side of the buckle (the far side, as in far away from the camera body).


5. Feed the end of the strap through the other opening in the buckle (the part closer to the camera body), making a small loop inside the larger loop. The end of the strap should now be sandwiched inside itself.


6. Carefully tighten everything by pulling the strap and sliding the retainer piece up.


You're done! Well, with one side. Now you just need to repeat on the other side, making sure your neck strap is not twisted when you slide it through the eyelet.
Now your strap is connected properly, in the safest way possible. It can hold the weight of your camera, won't come undone, and won't annoy you with floppy ends. Pin it if you learned something new!
This is Part 1 in a mini series about how to NOT drop your camera.
See Part 2 here: Using Your Camera Strap.
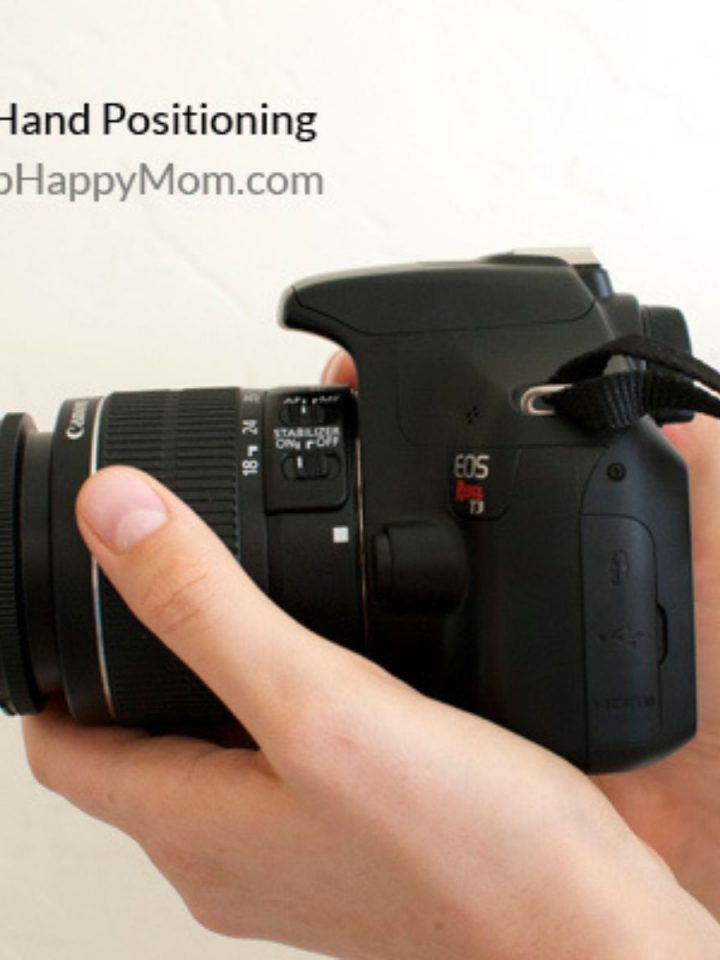
See Part 3 here: Holding the Camera Correctly

Sara M says
Wow. Thank you for the pictures. I got my first DSLR this weekend and had my strap on wrong, with the bunny ears. I will go fix this immediately!!
Stacie says
Totally just used this tutorial to fix my camera strap; thanks!
Marcie says
I called myself following the manufacturer's guideline when attaching my strap, but once I looked at your tutorial, I discovered that I still did not have the strap attached correctly! Thanks for such great step by step instructions and photos.
Sherry says
oh how I wish I had read your article before traveling to the Gulf with my new camera. My strap chose to come undone as I was walking on a pier. My camera rolled like a soccer ball right into a lagoon. I panicked and went in after it. Locals fished me, and an hour later with a bait casting net, my camera from the lagoon. It was a very upsetting ordeal for the entire family. Thankfully my photos was able to be retrieved from the disk and insurance replaced my camera and lens.
Esha mony says
That really helped..... thank you so much ❤
Jo says
Thank you so much, my camera instructions told me the bunny way and I couldn't even work that out!
jonas vilhelmsen says
Thank you! Felt pretty silly for not being able to put it on, but your guide made it pretty straight forward! 🙂
George Feith says
I took the long strap off completely and use the wrist strap all the time. When I carry it out in the field I left the small rings on each side and hook the shoulder strap to them. That way I don't have to worry about the long strap at all.
Meg says
If it works for you, great! I find moms usually need two free hands round their kids though. Either way, just make sure those straps are secure!
Kristin says
God bless you for this! I dropped my camera a small way today on carpet and it wouldn’t autofocus after that. I was having s tiny panic. I just got it YESTERDAY! I finally figured out that it was a user error with the lens but that camera strap is on there right now.
Natalie says
THANK YOU!!!
Tyler Mathew says
Thank you!
Tina says
Thank you so much for your detailed instructions! Appreciate these step by step photos. I hate watching videos, so your photos were perfect. I couldn't even remember how to put the strap on any way, let alone the wrong way or right way. This tutorial helped me not only get the strap on, but get it on the right way!