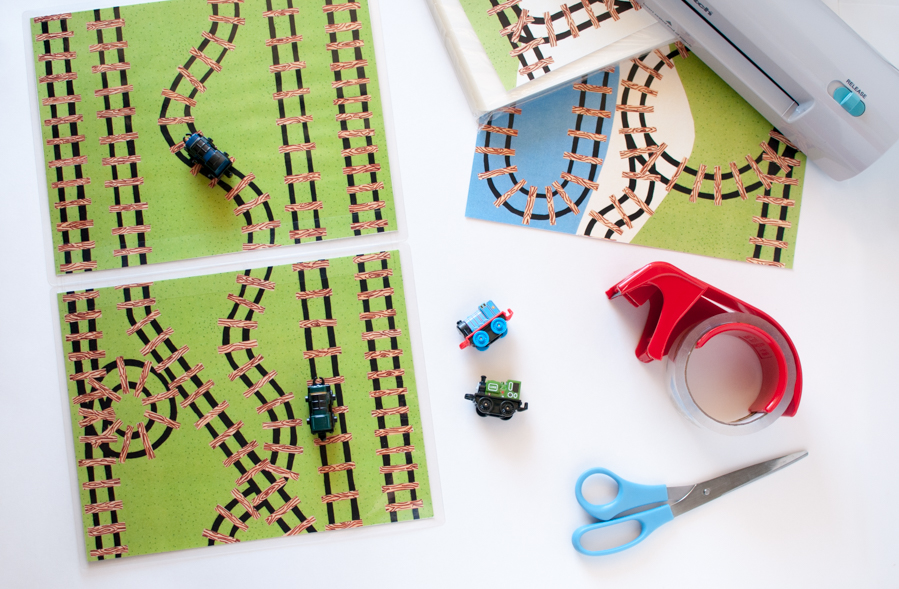
These are the instructions for laminating and assembling a play mat printable file into a sturdy, portable playmat for hours of play.
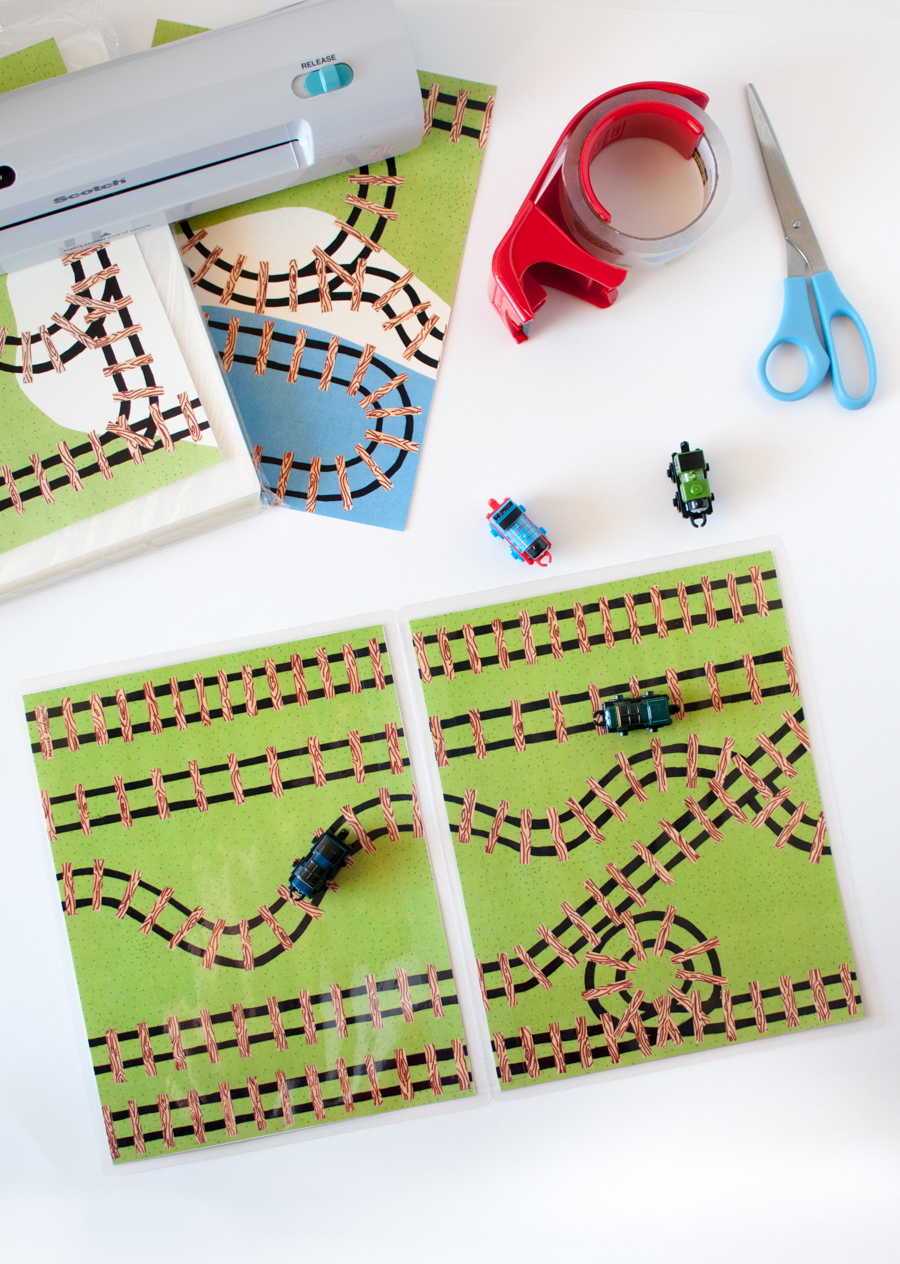
These instructions are intended to be used with this adorable Mini Train Play Mat Printable sold exclusively here on Snap Happy Mom. The file is printed, laminated, and assembled to form a two-page spread that folds out for play. One side has a landscape scene, and the other side has a racing track. If done correctly, the mat folds closed like a book to be more portable for your diaper bag or purse. Add a few mini trains for the perfect quiet activity!
Here are the detailed directions to show you how to make your own train mat!
WHAT YOU NEED
Digital download file
You'll need our adorable Mini Train Play Mat Printable file downloaded onto your home computer. Purchase it here!
Printer - or access to a professional shop like Kinkos, FedEx store, etc.
Scissors or a paper cutter
Clear packing tape - heavy duty if you can swing it!
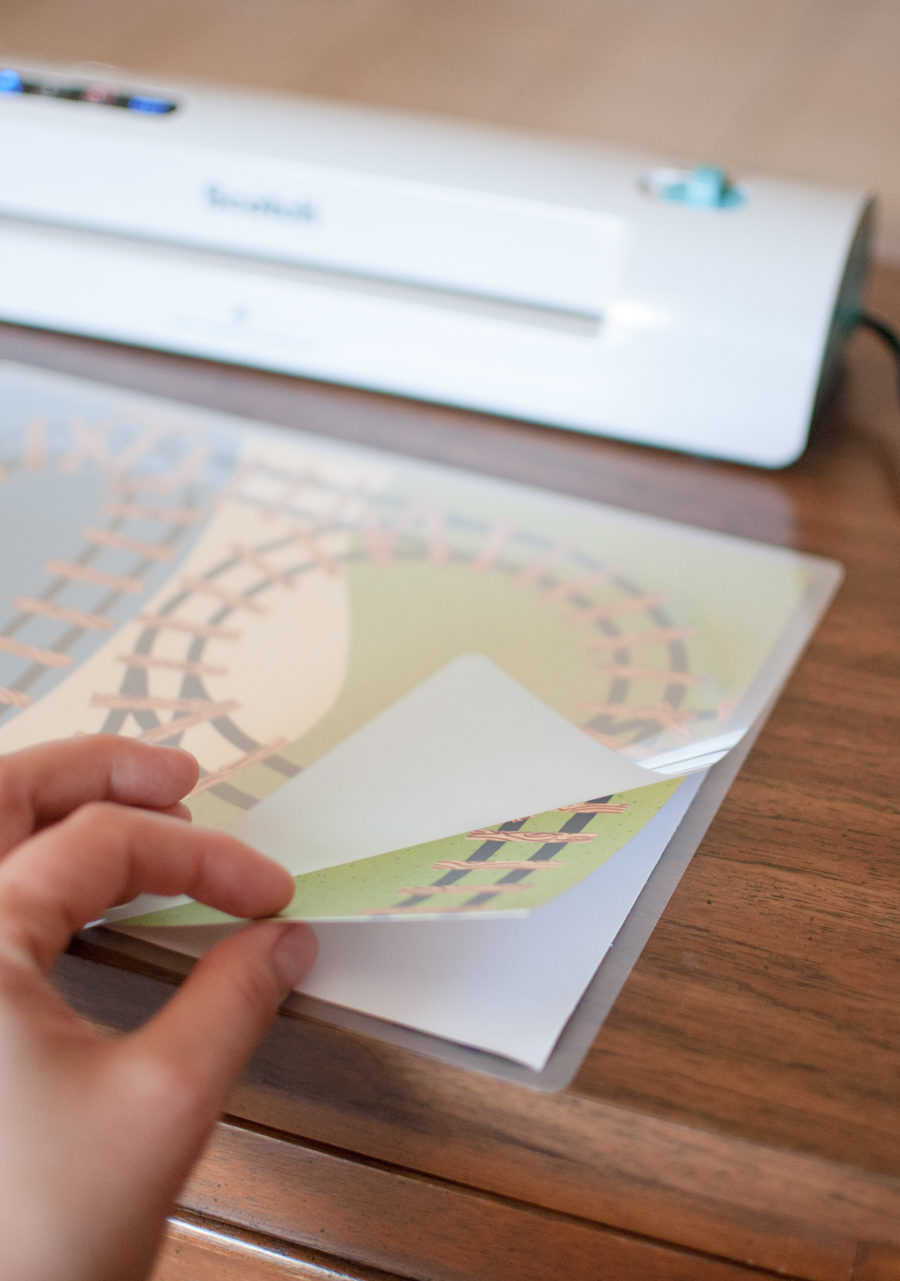
Home laminator
This is the home laminator I have and LOVE! It's a "pouch style" laminator which is the most efficient way to laminate things at home. A thermal laminator is useful for so many things - chore charts, to do lists, shopping lists, quotes, and of course, this play mat!
Thermal lamination pouches, 5 mm thickness, in 9 x 11.5 in
These are the clear sleeves/pouches you put your paper in to go through the laminator. I recommend these ones, since they are just as good as the name brand ones for half the price! Just make sure you use the 5 mm thick ones so that your play mat is super durable and long lasting (FYI: the 3mm pouches are technically cheaper but they aren't as thick and the hinge won't be strong enough).
INSTRUCTIONS FOR PRINTING A PLAY MAT
First you need to print your pages. We prefer to take the files on a thumb drive to a commercial printer like Staples, Office Max, or The UPS Store because the print quality is so much better, but you can totally print at home as well!
For the best results using a home "pouch-style" laminator, print the pages either single-sided on regular weight paper, or double-sided on card stock (80-110 lb). Printing single-sided on cardstock means you might not get as good of a seal, since you'd need to place two sheets of card stock into each laminating pouch. I recommend printing on regular paper!
If printing at a professional shop, ask for full bleed prints (where the image goes to the edge of the paper). If printing at home, just use the "fit" function on your printer and print each page as large as your printer will allow, and then trim off the white borders using scissors or a paper cutter.
If you're printing double-sided on cardstock, you'll have to load your printer manually, since your printer's "double-sided" option won't put the correct pages back to back for this project! Instead, be sure to print the left hand page of the landscape (page 1) back-to-back with the right hand page of the racing spread (page 4) , and the right hand page of the landscape (page 2) back-to-back with the left hand page of the racing spread (page 3).

INSTRUCTIONS FOR LAMINATING A PLAY MAT
Now you need to laminate your pages. Using a home laminator and special thermal pouches makes this process easy and super quick! These thermal sleeves come pre-sized for 8.5x11" papers, which is convenient for this project.
If you printed everything single-sided, lay out your printed pages to figure out which pages need to be back-to-back: pages 1 and 4 go together, and pages 2 and 3 go together. Take one set of pages, back-to-back, and place it inside a thermal lamination pouch, centering the two pages in the pouch (so that there will be a 1/4 to 1/2 inch clear lamination on all sides of the pages).
If you printed the pages double sided, then you will only need one double-sided page in each pouch.
Run the filled pouch through your laminator, according to the instructions included. I like to send each pouch through twice, to be extra sure that they are sealed well!

HOW TO ASSEMBLE THE PLAY MAT
The last step is to tape your laminated pages together.
To create a folding play mat, we taped the two laminated pages together like a book. You definitely want to use clear packing tape so that you can still see every inch of the tracks underneath!
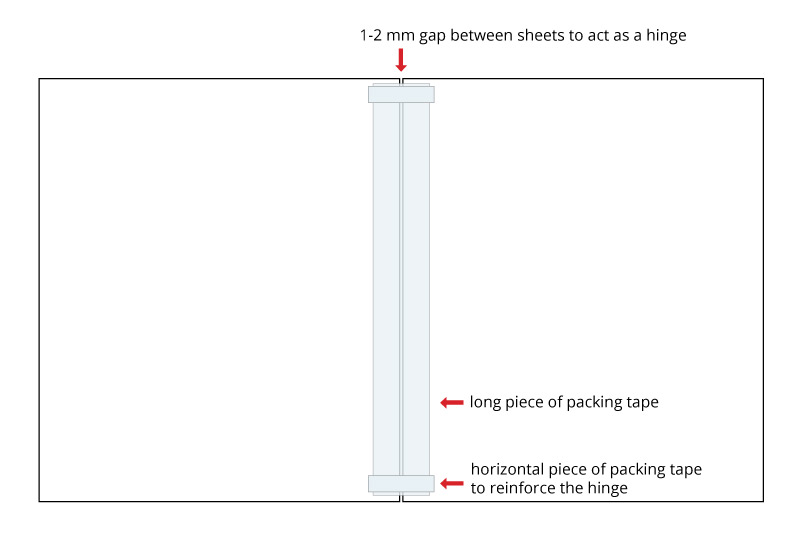
Lay out the two laminated pages so that the spreads are lined up, but with a 1-2 mm gap (about 1/16 of an inch) between the two pieces. This allows space for the tape to act like a hinge. Then, place a piece of packing tape along the entire length of the two pieces, taping them together (being careful to maintain the 1-2 mm gap).
Because clear packing tape is made to be ripped lengthwise, reinforce the "hinge" with two small pieces of horizontal tape at the top and the bottom, perpendicular to the long tape piece.

Repeat this taping on the reverse side of the play mat (one long piece, then two short pieces perpendicular to the first).
That's it! If you purchased the full bundle, you'll need to repeat the process to create your second play mat set. To play with both sets at once, place the play mats on a flat surface, and line up the train tracks connecting the two mats. Your two spreads can either be lined up on the long edge to make a squarish play mat, or along the short edge to make a racing mat.
Pair your completed play mat with a few mini trains, and enjoy!
Did you miss the file download? Click here to purchase the files for this play mat!


Leave a Reply