Photo tiles have gotten a lot more popular in recent years because they are a really cute, easy way to display photos in your home.
There are tons of companies out there that make photo tiles, but the quality is going to be different for each one. Some have sticky strips on the back, some use magnetic mounting, some come with frames, some don't... the list goes on.
We recently tried out TilePix, a popular photo tile brand, and here is what we thought!
Disclaimer: Tilepix offered me a coupon for 12 free tiles in return for this post - but I paid for extra tiles to get the look I wanted. All opinions are my own. I may earn affiliate commission if you purchase through my links, but it does not affect your price.
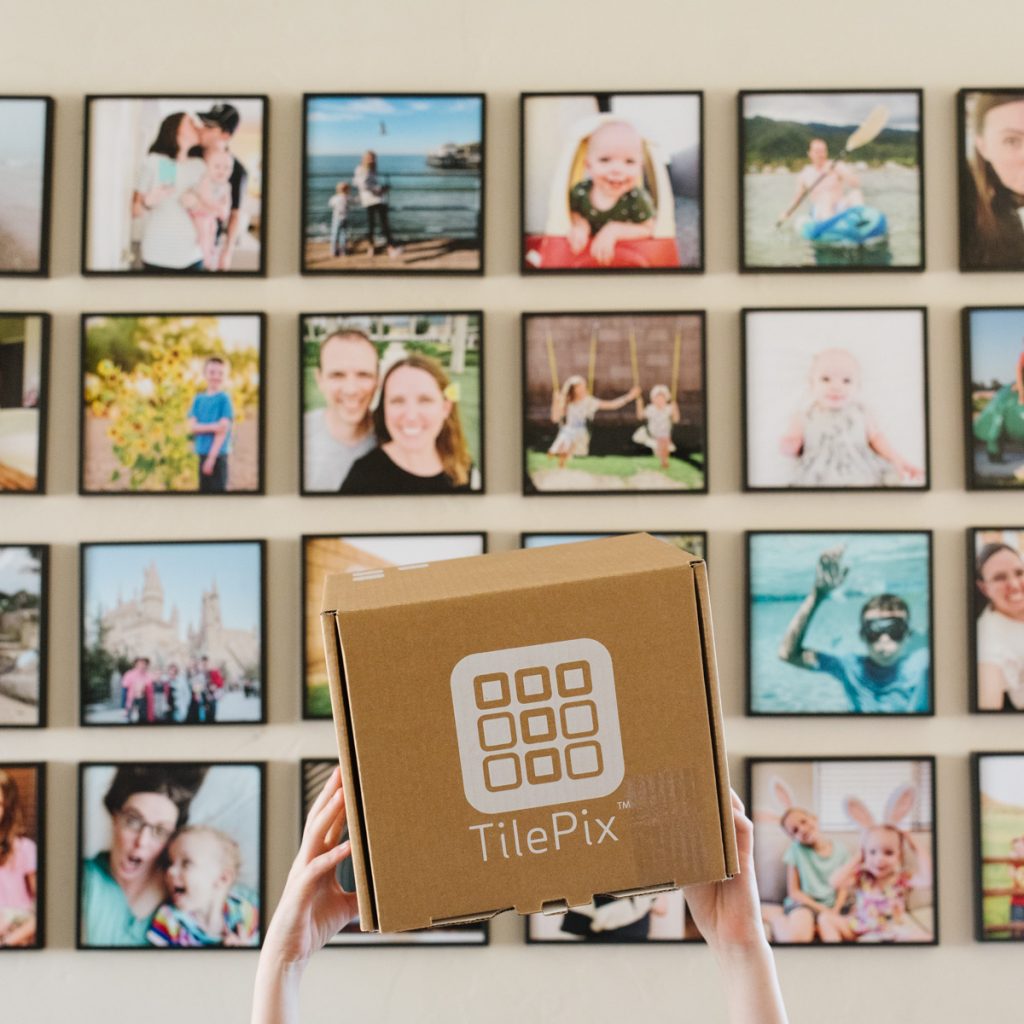
What is TilePix?
TilePix makes photo tiles with a super smart way of hanging them on the wall. While other brands stickable pads or tape, TilePix uses a magnetic mounting system that gives you tons of flexibility to move your pictures around.
Instead of the tile sticking directly to the wall, Tilepix sends you an adhesive magnetic pad that goes in between the tile and the wall.
The TilePix photo tiles have magnets on the back, so once the magnet is on the wall, you just stick your photo tile right to it! It's a really cool system that means you can swap pictures around very easily.
My walls are lightly textured, and I've had no problems with the adhesive pads. However, TilePix is happy to help you if you're worried about your wall texture; they also have a "Rough Wall Kit" that can help your mounting pads stick to heavily textured walls.
Our Experience with Tilepix
I ordered Tilepix with the plan that I wanted a collage in the living room. We have tons of fun pictures on my phone that needed to be displayed!
Getting 5 boxes in the mail was exciting: they were packed super well and protected from bumping each other or getting hurt in transit.

The box is actually very clever - you pull it open and all your memories are right there to flip through. It was fun to see them all right away!
I pulled out all my Tiles and started laying them out on the floor - this helped me decide that I wanted a 6x4 grid on the wall.
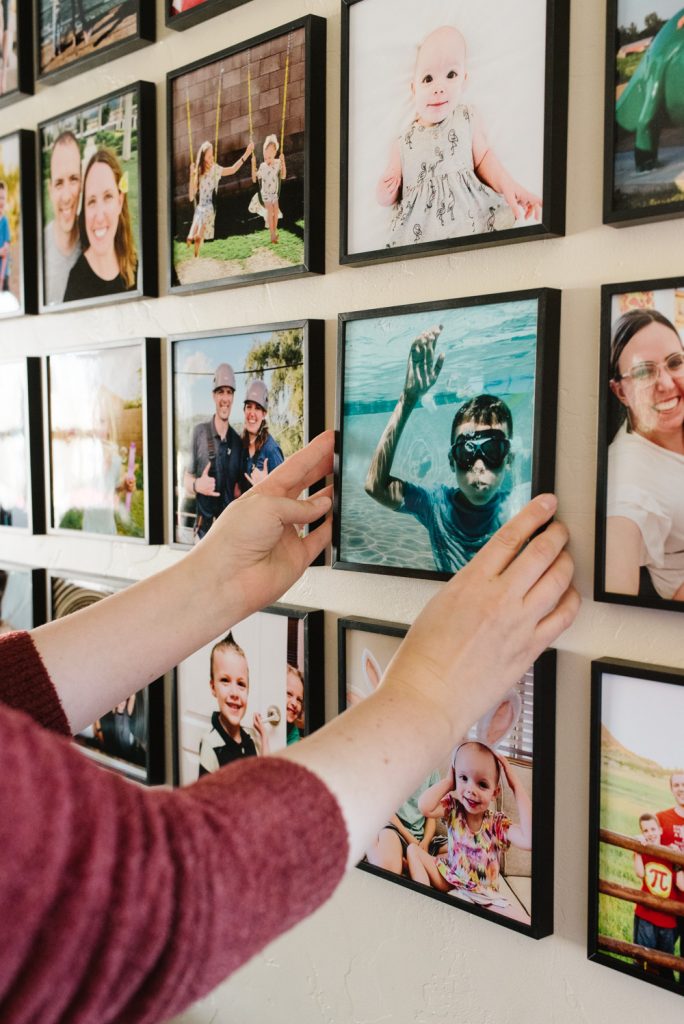
Putting them up is super simple: the back of each TilePix is magnetic, and it connects to a magnetic sticky pad. You just peel off the plastic that's covering the adhesive pad and stick the whole thing to the wall. The adhesive pad stays on the wall, but you can remove and shift the actual frame as you need to.
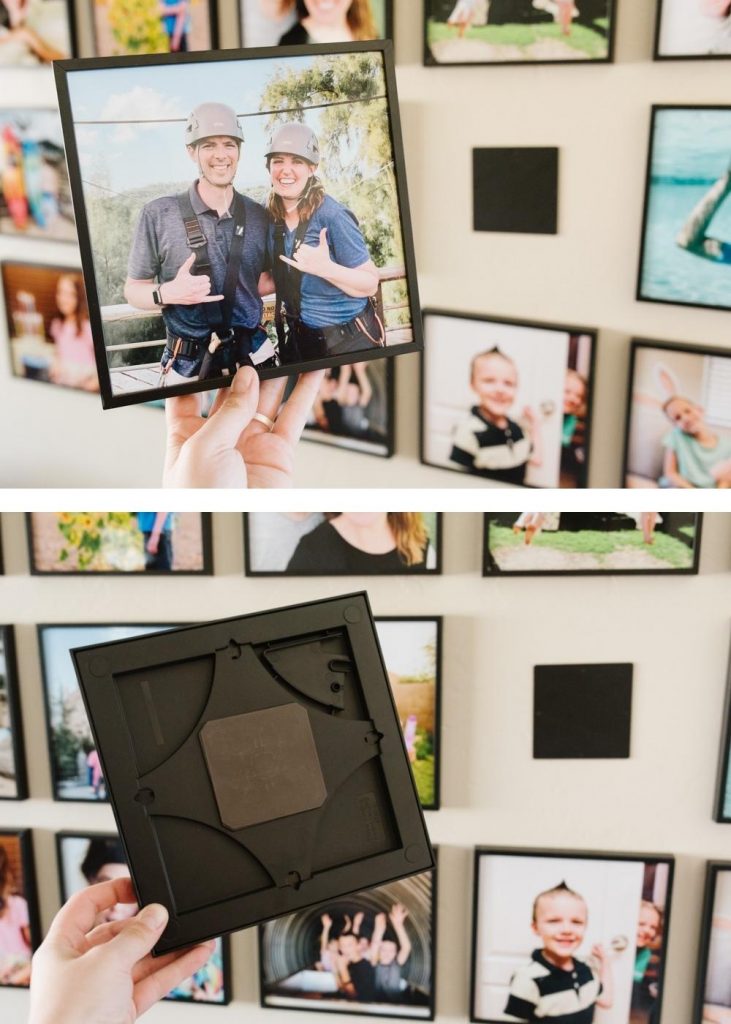
The beauty of this is that you don't have to get it level or perfectly space on the first try! Just get that magnetic sticky pad on the wall in the general vicinity first.
Then you can adjust and slide your tile around on the sticky pad until it's right where you want it. This makes it super fast to get your tiles up on the wall because you can eyeball where they go and then tilt/center/level it all afterward. (And if you mess up, you can pull the sticky pad right off the wall and restick it. Tilepix warns you that you can't do this lots of times, but I've had no problems with the ones I've stuck and restuck 3-4 times each)
It also means you don't have to decide on the perfect arrangement of photos in advance - you can tweak it as you go!
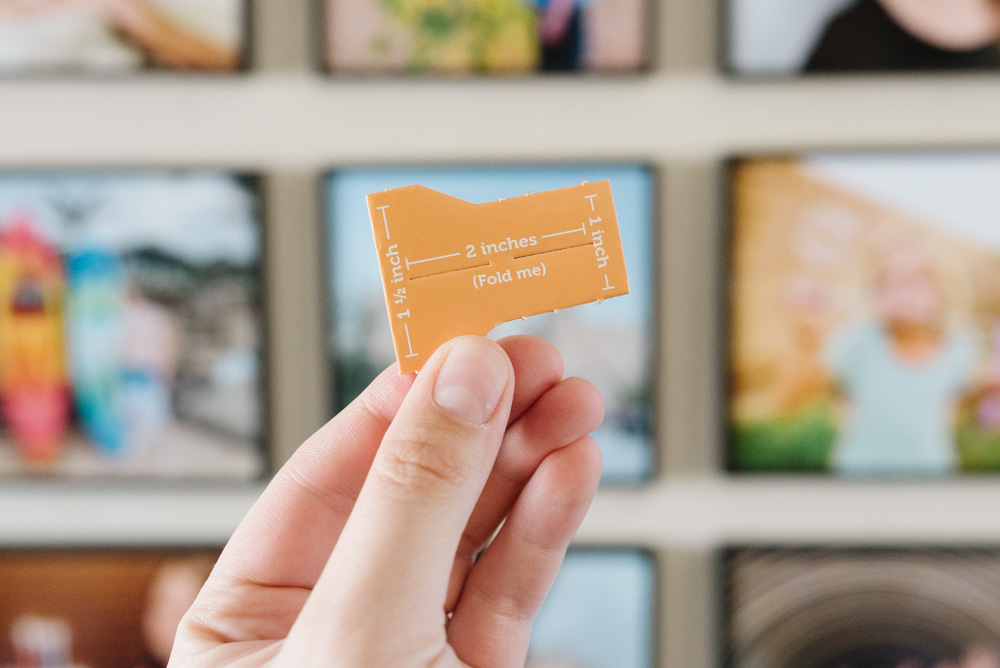
Plus, the Tilepix box comes with this handy little cardboard piece that pops out. Basically, it's a guide so you can perfectly space your tiles from each other on the wall. Super clever! It has a 2" measurement, a 1.5" measurement, and a 1" measurement, and makes it super easy to get the spacing just right.
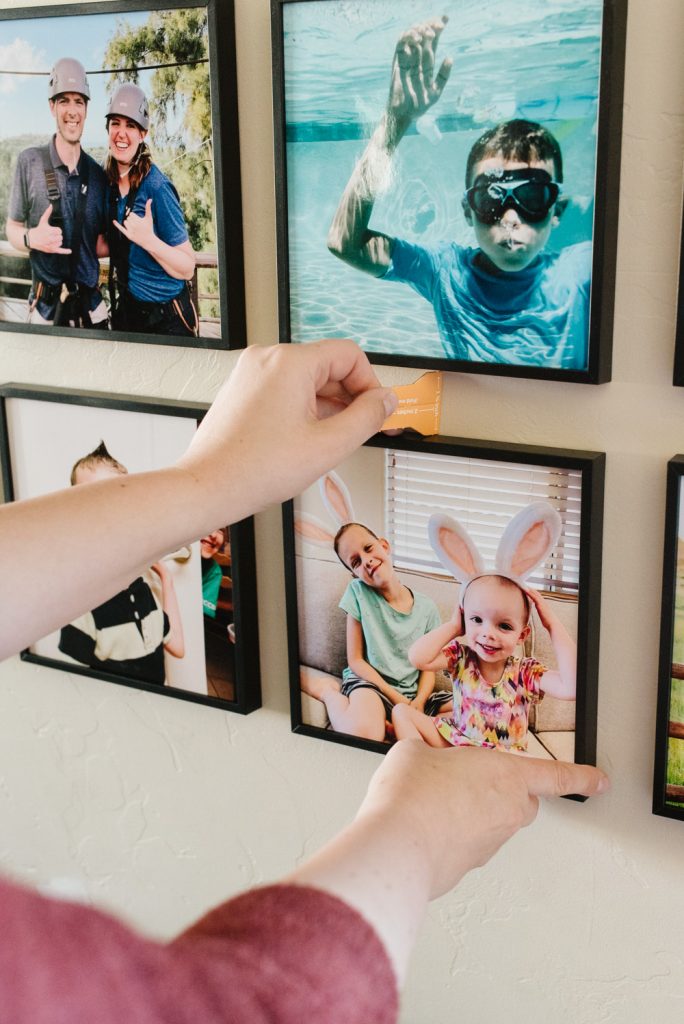
The magic of this system is that you can switch pictures around with no effort and no damage. One of my kids likes to grab the pictures of themself and put them all at the bottom where they can see them better. With Tilepix, that's no problem at all!
I'm already planning on twisting some of them upside down for April Foods Day! It's a great easy prank for a mom because it will take only a few seconds to turn them around, and then a few seconds to fix at the end of the day. Tilepix for the win!
What I LOVE About TilePix
They are the coolest frames out there!
I LOVE the clever frames and the ability to change them around SO easily! That's a huge selling point for me - no other company has such a unique and useful system for rearranging photo tiles.
My kids change the arrangement around all the time and it's a fun activity for them. This is by far the most flexible way to put re-positional frames on the wall.
The Tilepix frames are plastic - but the frame construction is good. There is a beveled corner (meaning a diagonal corner construction) that looks really nice and classy.
They convert easily to a tabletop frame.
Every Tilepix comes with a black triangular piece on the back, built into the frame. It's actually super clever because it pops out, and then you can slide it onto one side of your tile to make a tabletop frame instead!
I ordered 25 tiles and ended up with only 24 on the wall - it was so easy to pop out the piece and use it to show off a favorite picture on the nightstand instead.
They are lightweight on the wall.
These frames are not heavy at all. You can easily put them up on a wall and not worry about them hurting anyone if they came off.
They are easier and cheaper than regular frames.
Tilepix frames are $14/each at full price but they always have a deal going on. Compared to buying individual wood & glass frames and printing photos for them - plus the time of choosing and ordering from two different places - Tilepix is a core cost-effective option.
That's not to mention the massive difference in time and effort! No nails, hammers, heavy frames, measuring, or marking the wall. This is so much easier than that!
What I Didn't Love - but you might be okay with.
The photos are glossy.
This point is totally personal preference. All TilePix come in a glossy finish, and I wish there was a matte finish option.
I prefer matte photos for two main reasons 1) you can see them at any angle and 2) they don't attract fingerprints. That's just me and what I like.
However, the glossy finish on TilePix does make them look more like glass-covered frames which is what most people are used to on the wall - so this might not be a negative to you.
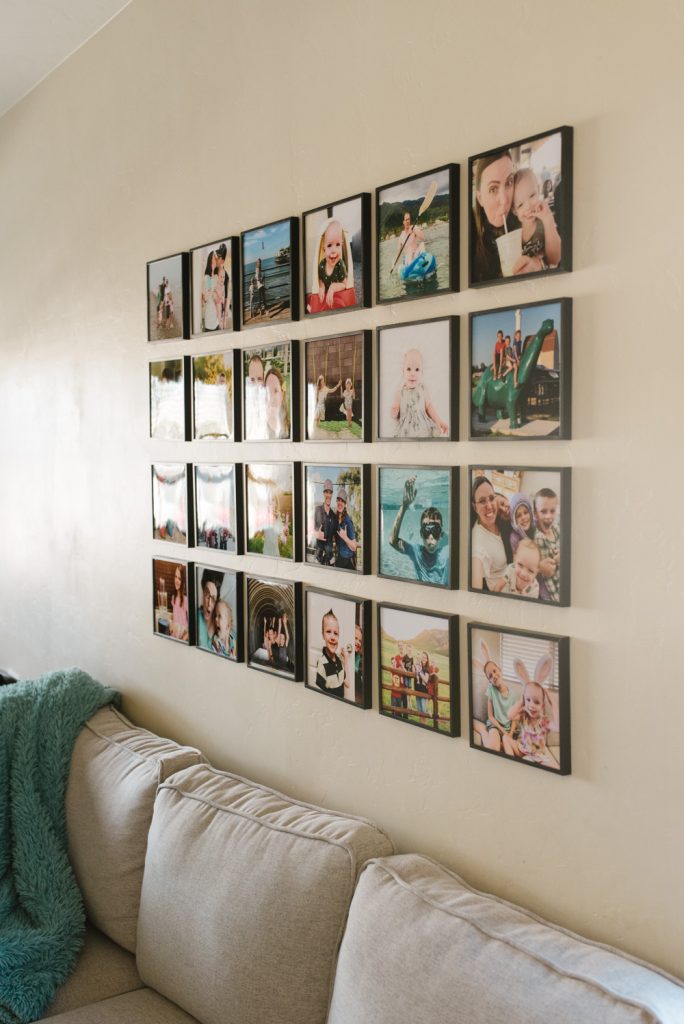
In my house, the glare from the window makes some pictures hard to see at an angle, as shown below.
The photo quality is Walgreens-level.
I am not in love with the photo quality - BUT you have to remember that running a photography blog makes me a *photo snob!* I don't think most people will be bothered by this; I just have a very high bar for quality.
The photos in Tilepix are printed by Walgreens. I'm not super clear if Tilepix itself was created by Walgreens or just acquired by them but either way, Walgreens is doing the fulfillment.
So if you already use Walgreens and are fine with the photo quality, then you'll be fine with the Tilepix. If you're pickier, you might feel like they are a tad underexposed and lack a touch of clarity. But again, if you're not a photographer, you're likely to be pretty happy with them.
If you're a perfectionist... you might not like how easily they move.
The only thing about how easy the tiles are to move on their magnetic pads is that... they are almost too easy to move. If you're a perfectionist and have small kids in the house, they will slide when kids touch them or move them around. (I guess this depends on your kids' ages and if they regularly touch things on the walls or not.)
We ended up changing the arrangement from what's pictured here because our toddler bumps the ones on the bottom row too easily if they climb on the couch.
Just something to think about; this could be easily mitigated by where you put your TilePix.
How do I order a TilePix?
Ordering from TilePix is pretty straightforward. Just click "Get Started," and then you'll be directed to a page where you'll select the photos you want to use.
After selecting your pictures, you can look at the frame options, mats, filters, and crop or edit your photos. You can choose between black, white, or gray frame styles. They have gray or white mats as well. You can also use interesting effects like splitting an image across several different tiles.
Then just click "Add to Cart" and you're ready to check out! New TilePix customers get 30% off automatically.
When you start your order, you can add them from Facebook, Instagram, or straight from your computer. When you first add them, you can't change anything about them. You might want to crop them or reposition them, but you can't do that in the first window. Just add all the photos first.
After you've added the photos you want, you'll get the chance to edit how the photos will fit on the tile. This is where you can crop, zoom in, or readjust your shot. You can also choose to split your photos among several tiles, and you can choose which frames and mat colors you'd like.
You can choose between white, black, and gray frames, and white or gray mats. I should note that they aren't really mats. The picture is shrunk down so that there is a white border that looks like a mat, but it's not a real mat. They'll still look really nice, but just a heads up.
After you're happy with the positioning and frame choice for your Tilepix photo tiles, you can add them to your cart and checkout.
Check out tilepix.com today!
FAQ about Tilepix
Can you change the photos in Tilepix? Can you replace photos in Tilepix?
You can't replace or change the photos in your Tilepix photo tiles. Those come already printed directly on your photo tiles, so you'll have to order new photo tiles if you want a different picture.
What is the cost of Tilepix?
Tilepix are $14 a tile, but if you buy more, then you'll get a discount. For example, if you buy 10+ tiles, they are 10% off so they only cost $12.60 each. If you get 20+, then they are 20% off and cost $11.20 each. And so on!
Does TilePix only have one size?
Yes. Photo tiles from TilePix are 8.25x8.25 inches and almost an inch thick.
Are TilePix magnetic?
Yes! They use a removable magnetic wall pad to attach to the wall.
How do you attach Tilepix to the wall?
A lot of photo tiles stick to the wall through sticky strips on the back, but TilePix uses a different method. TilePix uses magnetic mounting, which means no nails, tape, or sticky strips. You put a removable magnetic wall pad and snap your TilePix right to it.
Do TilePix stick to concrete walls?
The magnetic wall pads work on most walls, though they might not work well on brick, super textured walls, and some wallpapers. If you have rough walls and still want TilePix, you can use a small thumbtack to stick the wall pad to the uneven surface.
If you're not sure if your walls will work, you can email them with photos of your wall surface and they'll walk you through some options. They also have a "Rough Wall Kit" that you can use to stick to a heavily textured wall.
Are TilePix tiles heavy?
They are sturdy and durable. They are heavier than most other photo tiles, but still super lightweight.
Can I hang TilePix in the bathroom?
There are no disclaimers about humidity affecting photo tiles, so they should be fine in the bathroom, but the photo tiles are not waterproof so be careful not to get them wet.
Do TilePix peel paint?
Nope. Because the magnetic wall pads don't use tape, and you obviously won't need nails, you don't need to worry about any wall or paint damage.
What is on the back of TilePix?
The back of a TilePix photo tile has a magnet fitted to it which will match up with the magnetic pad you've put on your wall. Once you attach the photo tile to the wall, you can slide it around or adjust and rotate it in any way.
How much space should you leave between TilePix?
It's really up to you. There's no specific recommendation for it, so it's really up to what you think looks best. We'd recommend around 2 inches, but you can adjust it as needed.
Can you reposition TilePix?
One cool thing about TilePix is that you can easily rearrange them in several different configurations. Because you're not using any tape strips, you don't have to worry about the mounting losing its stickiness.
How many times can you move TilePix?
There's not a set amount, but because they don't use tape or sticky strips, you can reposition the tiles a lot without an issue!
If you want to take the magnetic sticky pad off the wall, you can do that a few times before it loses its stickiness.
Moving? Here's my storage hack for short-term or long-term Tilepix storage:
If you're moving or need to store your tiles, I have a hack for you! We took down our Tilepix to paint the living room and I figured out a great solution. Just grab some of the clear sheet protectors for three-ring binders! I just stuck the magnetic adhesive pads on the clear sleeves to store them (4 fit perfectly on one side, 4 on the other). I put the tiles back in their original boxes, but you could easily stack them in a different box as well. It was a no-fuss way to store Tilepix for later and retain their stickiness.
Do TilePix fall off the wall?
No, the patented magnetic mounting is built to hold the Tilepix photo tiles, so you don't have to worry about them detaching or falling off the wall.
That said, I wouldn't put your gallery where toddlers can reach them because they will love taking their photos down to look at themselves!
How long do they take for production?
Your TilePix products are usually shipped within just a day of ordering.
What about shipping?
TilePix ships from the US and shipping is always free on orders in the US. It will take 3 to 5 days to get to you.
If you need your photo tiles more quickly and you're ordering 6 tiles or less, you can also do free same-day pickup at a Walgreens near you. Just select the "Same Day Pickup" option at checkout and they'll be ready later that day!
Is TilePix worth it?
Tilepix is a really great way to show off your favorite photos and the magnetic mounting ensures that your wall won't have any damage. I love my gallery of 24 tiles!
If you're looking for photo tiles that won't damage your wall and will last a really long time, we'd definitely suggest TilePix. You have tons of options between frames, borders, or just the picture itself.
Mine was super easy to hang up and look really great on the wall. Check out tilepix.com to order your own!


Peggy says
I have 1 tile pix that WILL NOT stay on the wall. I have 5 that stay on the same wall but one that the magnet keeps falling off the wall. Can I get a new magnet for the wall?
Tammy shanks says
I loooooooove my tile pix, they’ve been up for a year and have never fallen and I love the way that they were adjustable like if I don’t hang it straight I can move it so it looks like a hung up perfectly and I’ve actually move the pictures a couple of times one part of the house or the other and they peel right off the walls. There’s no damage to the walls and that’s my favorite part.
Jane says
Would these work in an RV? How much movement can they withstand?
Meg says
I don't really know! It's hard to test that myself on walls that don't move. Maybe order 2 or 3 and test it out?
Lorraine says
This information was very helpful! The only question I have is would it be better to make a modifications to the pictures ie cropping or color correction on my iPhone or computer prior to uploading them to the tilepix frames?
Meg says
I would do color correction before, and them just center/crop as I upload.
Brian says
Regarding the part that adheres to the wall, if it ever needs to be removed does it damage the paint or tear off the first layer of the sheetrock? Is there adhesive left behind that needs to be removed? I'd rather not need to re-sheetrock the wall if we decide to permanently remove the images.
Thanks
Meg says
Mine have not damaged the wall, nor left behind any adhesive residue.
Deanna says
I just ordered 9 of these from Walgreens and 5 of the nine magnets wouldn’t stick to the wall. Before even putting a picture on it, they fell. Super disappointing! I may be returning them all